BEST PRACTICES FOR
FIBER-OPTIC CABLING INSTALLATION
To ensure the best functioning of your cables, we highly recommend implementing the following practices for the installation of your fiber optic cabling – before, during, and after installing. This guide will help you avoid failure due to inadequate planning, mishandling of fiber cabling, improper testing, and speed up installation.
Develop a port map
The first step before even looking at a cabling design, is to develop a detailed port map. If you are hiring someone else to install the cables, they'll still ask for a port map. A port map serves as an inventory sheet and installation guide and should include the name of each port and what it connects to, the location of network cabinets, patch panels, and additional hardware. There are two primary reasons you want a port map: reference and efficiency. Having a detailed map of your cabling and hardware will make installation much faster. Additionally, you can reference the map in the event of network issues and when you must identify which cable connects to which node or server, and so forth.
Conduct a thorough site survey prior to cable placement
The purpose of a site survey is to recognize circumstances or locations in need of special attention. For example, physical hazards such as high temperatures or operating machinery should be noted and the cable route planned accordingly. If the fiber optic cable has metallic components, it should be kept clear of power cables. Additionally, local building code regulations must be considered. If there are questions regarding local building codes or regulations, they should be addressed to the authority having jurisdiction, such as the appropriate building inspector.
The site survey should focus on determining the following factors:
- The most appropriate route for each cable. This could be regarding the existing cable runs or in respect of the proposed newly installed cable housings. It will generally be more cost-effective to use existing infrastructure, but the decision depends on the amount of space in the existing housing and on the condition of the housing. Also, an existing cabling route may take a longer path and the extra cabling costs associated with this may exceed the costs of installing a new route.
- The need to run the cables in cable trays, underground, in rooftops or as aerial cables.
- The condition of existing cable housings. (Whether costly maintenance is required before new cables are installed.) Is there any potential danger that could cause damage to the cable because of the poor condition of housings? For example, are the housings prone to be affected by flooding?
- Whether there are any locations that need special attention. Should tradesmen with special skills be deployed to carry out the job? Are there any locations that could subject cables to extreme temperatures? If so, provision is necessary to use fire or explosion-proof cables.
- Are there locations that could subject cables to possible physical damage? If so, provision is necessary to provide appropriate steel armored cables.
- Would the cable route run near high-power cables? If so, ensure that the fiber optic cable does not contain any metal (strengthening member or sheath).
- Would the cable route run near areas of high transient voltages (for example, lightning)? If so, ensure the fiber optic cable does not contain any metal.
- Ensure that the installation adheres to all existing electrical and fire codes of the country in which the installation is planned.
- Obtain all required council and government permits before commencing any civil works on public land.
- Will there be sufficient room to use the cable-pulling equipment? If not, what equipment needs to be moved to carry out the installation without hindrance?
- Will cars or trucks be driving over the cable, people walking over it or heavy objects laid across it? If so, plan to take the necessary precautions to protect the cable (for example, conduits) and/or to use the correct sheathed cables.
- Locate all the intermediate points from where the cable is to be pulled and where junction boxes are to be located.
- Identify appropriate locations for installing termination cabinets and splicing trays.
- Determine the exact locations for each data equipment hub.
- Talk to local employees to determine if there are any foreseeable problems that may arise during the installation that can be averted now by careful planning.
- All these particulars should be carefully noted during the site survey and then officially and completely documented after the survey is done. These findings would be useful while designing the cable system.
Determine how much cable is necessary
Probably the most basic step of all that so many people miss is measuring their facility. You don't want to be in the middle of installing your cables only to realize you didn't order enough or far too much. Granted, you do want to order extra lengths because you don't want the cables to be like a tightrope; there should be some slack. Additionally, most scenarios will require cables in a multitude of directions that require additional cable. For instance, most buildings probably aren't lucky enough to have all their connection points in a linear direction. You may have to install the cables around corners and partially vertically, both of which can reduce the amount of cable you thought you had. Measure twice; install once.
Develop a cable-pulling plan
A cable pulling plan should communicate the considerations noted during the site survey to the installation team. This includes the logistics of cable let-off/pulling equipment, the location of intermediate access points, splice locations and the specific responsibilities of each member of the installation team.
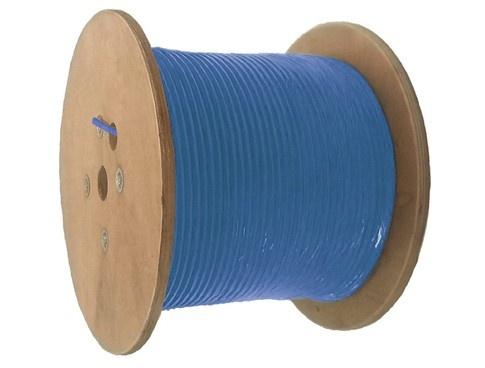
Do not exceed cable maximum recommended load
While fiber optic cables are typically stronger than copper cables, it is still important that the cable's maximum pulling tension not be exceeded during any phase of cable installation. In general, most cables designed for outdoor use have a strength rating of at least 600 lbs.
Most fiber optic cables also have a maximum recommended load value for long-term application. After cable placement is complete the residual tension on the cable should be less than this value. For vertical installations, it is recommended that the cable be clamped at frequent intervals to prevent the cable weight from exceeding the maximum recommended long-term load. The clamping intervals should be sufficient to prevent cable movement as well as to provide weight support.
Follow proper procedures
Because fibers are sensitive to moisture, the cable end should be covered with an end cap, heavy tape, or equivalent at all times. The let-off reel must never be left unattended during a pull because excess or difficult pulls, center-pull or back-feeding techniques may be employed.
Labeling your cables
Never pinch, twist or bend fiber optic cables
Properly labeled cables are an essential part of an effective structured cabling system and fiber network. Allowing for easier identification and quicker isolation of cables, it offers installers increased productivity, profitability, reliability, and safety. Following best practices and standards when it comes to labeling is important.
The TIA-606 voluntary standard recommends that you include on each label link identifiers that show the exact location the cable is running to and from. This information could include the floor number, closet, rack, patch panel, and port. For example, 2B.5-13.08/2B.1-1.24 tells us that the cable is run from the 2nd floor, closet B, rack 5, patch panel 13/port 8 to rack 1, patch panel 1/port24. This detail gives you exact specifications on where this cable runs to and from. Your expert structured cabling system installer should be aware of these standards and follow them effectively.
Many people don't realize how small the fibers in a fiber optic cable truly are. To put it into perspective, optical fibers are as thin as a human hair and typically made of glass or sometimes plastic; in other words, they can be fragile.
When handling fiber optic cables, you should never pinch the cable jacket to eliminate the possibility of broken fibers. Similarly, you shouldn't twist fiber optic cables for the same reason. Finally, you'll probably need to run your cable around a corner or bend of some sort; it's vital that you know your cable's permitted bend radius.
Do not exceed cable minimum bend radius
Never exceed the cable bend radius. Fiber is stronger than steel when you pull it straight, but it breaks easily when bent too tightly. This will harm the fibers, maybe immediately, maybe not for a few years - but you will harm them, and the cable must then be removed and thrown away.
There are two types of bend radius:
- The short-term minimum bend radius, or dynamic bend radius, is the tightest recommended bend while installing cable at the maximum rated tension. It is the larger of the two specified bend radii. Throughout the pull, the minimum bend radius must be strictly followed. If a location exists in the middle of a run where a relatively tight bend is unavoidable, the cable should be hand-fed around the bend or a pulley can be used.
- The long-term bend radius, or static bend radius, is the tightest recommended bend while the cable is under a minimum tension. It is the smaller of the two specified bend radii. After the pull is complete, the cable can be bent more tightly to fit into existing space, but not to exceed the long-term minimum bend radius.
- Always follow the manufacturer's guidelines for minimum bend radius and tension. Failure to do so may result in high attenuation (macro bends) and possible damage to the cable and fiber. Guidelines are normally supplied with the cable manufacturer specification sheets. If the bend radius specifications are unknown, the industry de facto standard is to maintain a minimum radius of 20X the diameter of the cable.
- The minimum bend radius must also be adhered to when using service loops. Fiber optic splice trays and patch panels are designed to accommodate the bend radii of the individual fibers, but outside of the hardware, extra care must be taken.
Short term (installation) | Long term (installed) | ||
|---|---|---|---|
Outside plant cable | 20 x cable diameter | 15 x cable diameter | |
Premise cable | 15 x cable diameter | 10 x cable diameter |
Fiber optic service loops and breakout lengths
Adding length to a cable for contingencies creates service loops. The use of short service loops (three to six feet) can be helpful when cutting trunk lengths based on estimated lengths. There is a downside to service loops because they can cause too much cable congestion in the cabinet...The overage allows the option of moving patch panels or enclosures within the cabinet...Data center operators decide whether service loops will be managed vertically or horizontally at specific rack units.
It can be helpful to allow the movement of patch panels inside the cabinet with service loops for both fiber and copper if growth is expected. However, copper trunk service loops quickly can become unmanageable in typical server cabinets...Copper trunking is thicker and stiffer than fiber optic trunking. Copper also can have negative performance results from crosstalk when too many strands are bunched together in a bundle or tight space...If the cabinet is two feet wide and less than four feet deep, plan for minimal service loops, or no service loops at all.
A breakout length for your cables is the distance between the furcation point (where the cable separates from a single, consolidated sheathing) and the connector end. It is possible to stagger these breakout lengths to plug into specific hardware, ports, or patch panels.
A note on furcation points – when securing fiber trunk cables to enclosures, racks, or cabinets, only use zip ties on the trunks' furcation points. The furcation point is designed for this, as it has a metal sleeve to protect the fiber...For all other applications use ONLY Velcro. Using zip ties on the fiber optic jacket directly can break the fibers.
Clean your fiber!
Maintaining clean fiber optic cables is an essential part of any network installation, but proper cleaning often gets overlooked. A clean fiber network can be the difference between a secure and robust network connection and one that might not be as robust.
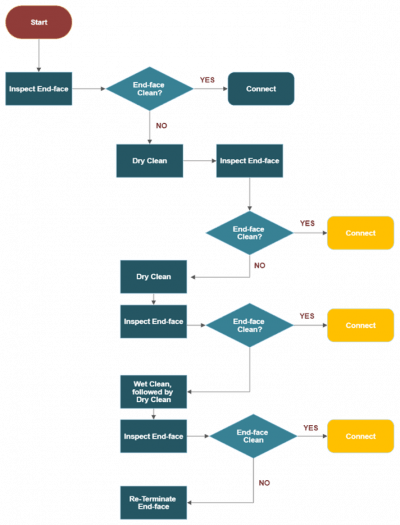
Here are some dos and don'ts of cleaning fiber:
- Never touch the end-face of the fiber connectors - natural body oil can be a major cause of contamination.
- Always keep a protective cap on unplugged fiber connectors - protection from both damage and contamination.
- Do not clean bulkhead connectors without a way of inspecting them - how else will you know whether the cleaning is successful?
- Always store unused protective caps in a sealed container - they can be a major source of contamination if not stored in a clean environment.
- Never reuse any tissue, swab, or cleaning cassette reel.
- Never touch any portion of tissue or swab where alcohol was applied - you could be introducing both dirt and body oil.
- Never use a wet cleaning method without a way of dry cleaning immediately afterward - the wet process can leave a harmful residue that is hard to remove when it dries.
Practice cable management
As fiber optic cables are generally thinner than copper cables, cable management becomes more critical.
To route fiber optic jumper cables and copper patch cords from the patch panel to active ports within the same cabinet, use a combination of horizontal and vertical cable management. To route cables, connect the left side of the patch panel to active ports on the left, and the right side of the patch panel to the right side of the patch panel.
Why? A well-placed cable facilitates access to transceivers and ports on both active equipment and patch panels. By doing so, new cables can be added and removed as needed. Additionally, it simplifies the process of finding a specific cable.
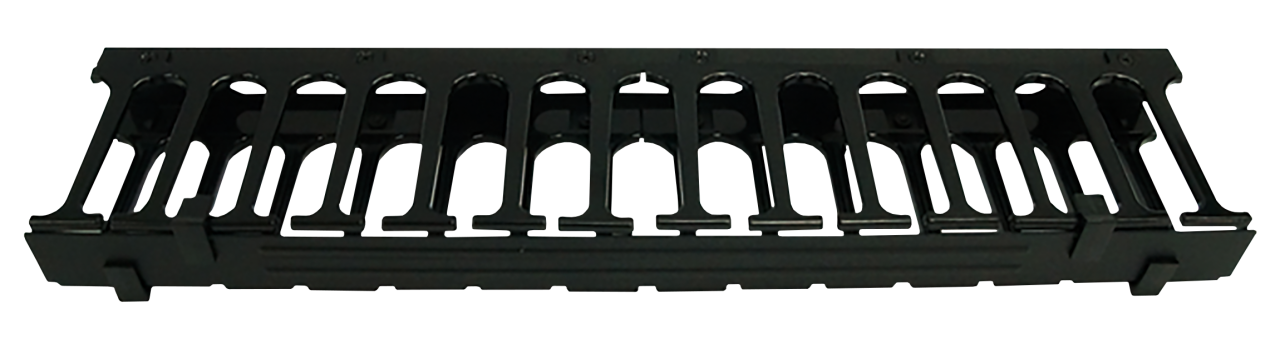
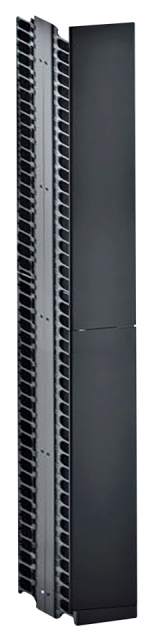
The best cable management solution for fiber optic cables is a horizontal finger style with a front cover cable manager in a 1U or 2U footprint. For core cabinets, main patch cabinets, cross-connect cabinets or large body cabinets, consider vertical cable managers.
Conduct post-installation testing
Once a fiber optic cable plant, network, system or link is installed, it needs to be tested for four reasons:
- To ensure the fiber optic cable installation was properly installed to specified industry standards.
- To ensure the equipment intended for use on the cable plant will operate properly on the cabling.
- To ensure the communications equipment is working to specifications.
- To document the cable plant and network for reference in case of future problems.
The following tools are needed to test and troubleshoot the fiber optic plant, system or link properly:
- Optical Loss Test Set or power meter and test source with optical ratings matching the specifications of the installed system (fiber type and transmitter wavelength and type) and proper connector adapters. An OLTS that merely tests cable plant loss may not include a calibrated power meter needed for testing transmitter and receiver power, so a calibrated power meter and source are a better choice for link or system testing.
- Visual fiber tracer and/or visual fault locator (VFL).
- Reference test cables with proper-sized fiber and connectors and compatible mating adapters of known good quality. These do not need to be "reference quality" but only in good condition, generally defined as having connector losses of less than 0.5 dB.
- Optional: OTDR with long launch cable (100 m for Multimode, 1 km or more for single mode).
Test results should be recorded in both soft and hard copy and should include the date of the test; name(s) of test personnel; and identification of the field test instrument used, including manufacturer, model, and serial number, and date of most recent calibration of the test instrument.
CONCLUSION
Fiber optic technology is among the most reliable options available today. Like all network technology, fiber optics are always evolving, but the best practices for fiber optic cable installation remain constant. Now that you know how to install fiber optic cables properly, you can protect your investment by knowing your cable's ratings and avoiding the common mistakes we discussed. For the best network results, you should always ensure you're using quality cables. It's tempting to purchase the cheapest ones you can find, but you get what you pay for when it comes to fiber optic technology.
DINTEK have a comprehensive range of fiber optic products - click here to view!


