Understanding Multimode and Singlemode Fiber Optic Cables
TIPS FOR INSTALLING FIBER OPTIC CABLE


Harnessing the full potential of fiber optics hinges greatly on the quality of its installation. In this article, we'll delve into the essential tips and strategies for ensuring a seamless installation experience.
Thorough planning and documentation
Before diving into the installation process, take the time to meticulously plan the layout of your fiber optic network. Draft a comprehensive written installation strategy. By formulating such a plan, you can address 95% of potential issues that installers might face. This plan should encompass the necessary equipment and supplies, specifications of the fiber cable, placement of equipment, criteria for testing, documentation for test results, the expertise and roles of personnel, techniques for installation, identification of areas that may present challenges, safety considerations, and more.
Invest in quality products
Opt for high-quality fiber optic cables, connectors, and other components. Inferior materials can compromise the performance of your network and lead to frequent maintenance issues. It's essential to choose cables with the appropriate bandwidth and specifications for your specific application.
Cable handling techniques
Handle fiber properly and consider length!
Never pull on the fiber. Fiber optic cables have Kevlar aramid yard or a fiberglass rod as their strength member. Pull on the cable strength member only.
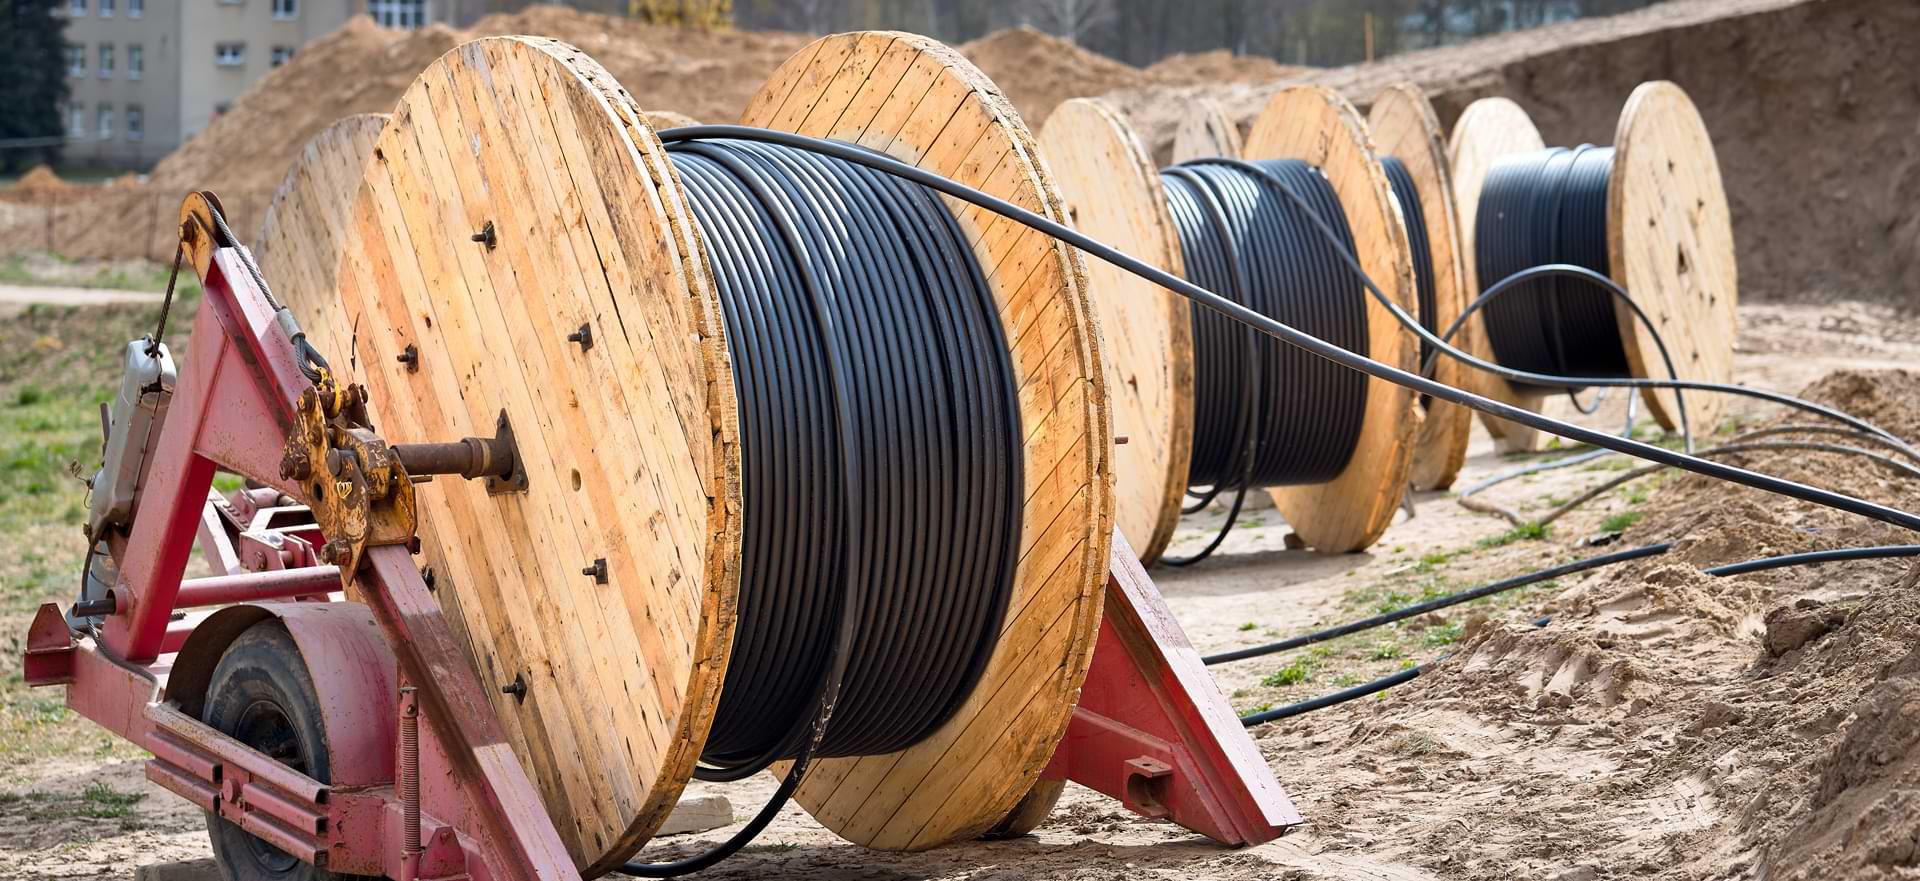
Keep an eye on the supply reel. It's important to watch the supply reel while installing to ensure the minimum bend radius isn't compromised.
Use proper cable pulling lubricants.
Sequentially mark the pulling role for easy identification.
Use extreme caution when removing the pull eye.
Ensure the fiber cable is long enough for the run to avoid splicing complexities.
Opt for a single-pull installation where possible.
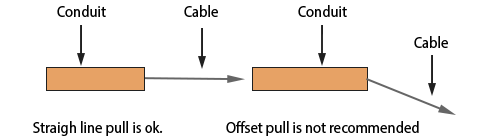
Make an effort to extract cables from a conduit with as straight an angle as feasible. Pulling at an angle has the potential to inflict damage on the cable.
Maximum pulling load
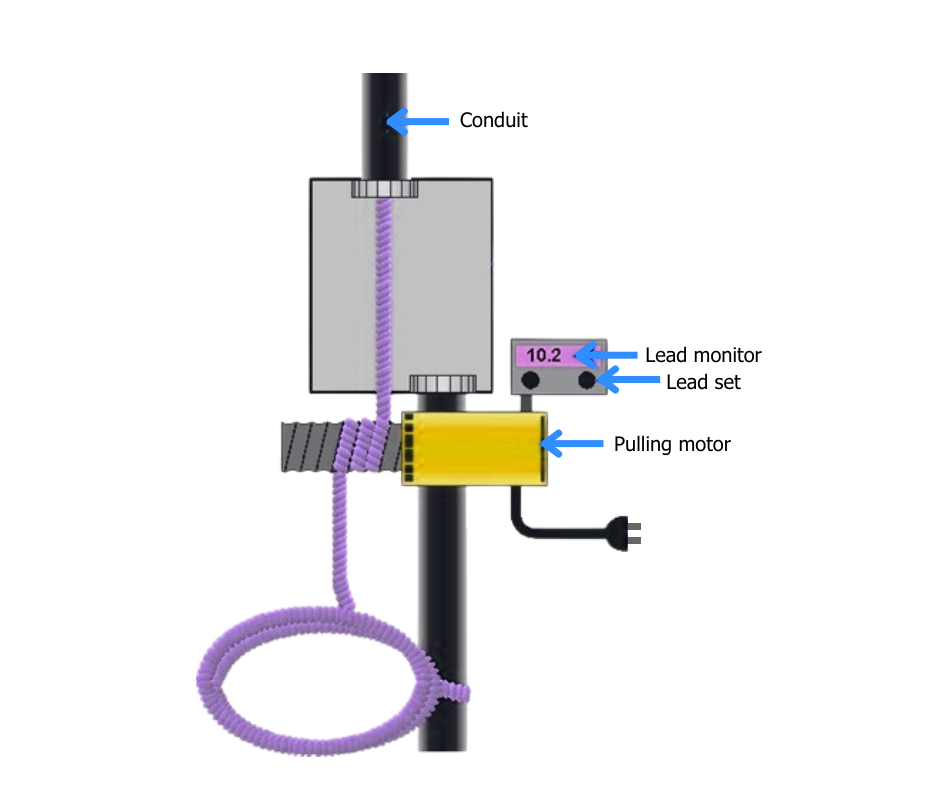
Don't exceed the maximum pulling load rating. For extended cable installations, employ suitable lubricants that are compatible with the cable jacket. When dealing with exceptionally lengthy runs, adopt a strategy of pulling from the middle towards both ends. If feasible, consider the utilization of automated pullers featuring tension control, or alternatively, employ a breakaway pulling eye.
Cable bend & twist prevention
Avoid twisting the fiber cable during installation.
Always adhere to the cable bend radius. Although fiber is stronger than steel when pulled straight, excessive bending can easily cause it to break. This can damage the fibers, either immediately or over time, necessitating the removal and disposal of the cable.
Opt for rolling the cable off the spool rather than unwinding it from the spool end. Each turn on the spool adds a twist to the cable. Avoid twisting the fiber cable, as introducing twists can also stress the fibers.
Use the figure 8 technique to handle cable efficiently. Divide long pulls into shorter sections, arranging the cable in a large figure 8 pattern on the ground. Lift and flip the pattern, ensuring the loose end is on top, and pull it into the next conduit or duct section. This technique effectively prevents cable twisting.
Aerial and conduit installations
Exercise utmost caution during aerial installations and ensure that qualified personnel are present on-site, especially when working near high-voltage lines. Cables positioned in proximity to high-voltage power lines, including all-dielectric cables, must be properly grounded.
Maintain a consistent and safe clearance between the fiber optic cable and power cables, taking into account potential sag caused by weather and current conditions. Be mindful that cable sag tends to increase during warm weather or when power cables are carrying heavy currents.
In instances where a steel messenger wire is utilized for aerial installations, it is advisable to avoid zigzagging it from one pole side to the other. Instead, strive to keep the messenger wire on one side as much as possible to enhance safety and efficiency.
For newly installed underground conduits, it is recommended to have a minimum size ranging from 40mm to 50mm. If the installation involves a lengthy run or anticipates potential future cable pulls, consider opting for a conduit size of 100mm or greater.
When planning the conduit run, aim to minimize bends for optimal efficiency. If the run necessitates several bends, contemplate the installation of junction boxes instead of bends to enhance the overall design.
Use plastic bushings on conduit ends to avoid damage to the cable during the pull.
Compliance with vertical rise limits
Know and observe the maximum vertical rise distance limit. Exceeding this limit can result in fiber breakage, excess attenuation, and, in loose tube cables, fibers sliding from cables.
Cables in vertical installations that are longer than the vertical rise limit must be tied off at distances less than this limit.
Loose tube cables must be looped.
Thermal expansion and contraction
Allow for thermal expansion and contraction, especially in outdoor installations.
A common practice is to maintain a 0.75m sag for a 45m span to accommodate thermal changes.
Failure to allow for thermal expansion can result in increased attenuation and breakage of fibers.
Loose buffer tube fiber cables
For tough installations, opt for loose buffer tube fiber cables.
Loose tube cables can be more forgiving of abuse than tight buffer cables.
The excess length of fiber in the buffer tube and the ability of fiber to move from a low-stress region to a higher-stress region contribute to their resilience.
Observing temperature operating range
Install cables in locations where the temperature range imposed is within the specified operating range.
Violation of the temperature operating range can lead to excessively high attenuation.
Cable end sealing and protection
Cap or seal water-blocked cables with water-blocking gel or grease.
Protect fibers and buffer tubes by confining them in protective structures such as splice trays and cable end boxes.
Vertical cable installation and safety measures
Loop vertically installed loose tube cables with vertical, unfilled, loops to prevent fiber slippage.
Check continuity and attenuation before each operation, including before installation, after installation, after splicing, and after connector installation.
Mark cable as "Fiber Optic Cable" for easy identification by electricians.
Cable blowing
Cable Blowing or Jetting in Duct Applications: Before proceeding, conduct a crash test to identify the maximum safe pushing force for the cable. Overpushing can lead to the cable twisting or folding inside the duct, which can damage the fiber.
For cable blowing, assess the intended path to establish the optimal length for blowing the cable. Adhere to the recommendations provided by the equipment's manufacturer, which typically suggest a blowing range of 900m to 1.8km feet. In some cases, employing multiple blowing machines might be necessary.
Ensure the maintenance of adequate air flow during the blowing process to propel the cable, rather than forcing it mechanically. It's essential to use an air compressor that delivers at least 100 cubic meters per minute (cmm) of air. The air pressure inside the duct should be at least 680kpa, with 850kpa being the preferred pressure. If the ambient temperature rises above 27˚C, utilize an air compressor cooler as advised by the blowing equipment's manufacturer to prevent overheating.
Lastly, only apply cable/duct lubricants that are specifically recommended by the manufacturer of the blowing equipment for use with optical fiber cables. This ensures compatibility and prevents potential damage to the cable.
Maintenance, safety and testing protocols
Utilize appropriate tools and methods. Employing a vehicle for cable pulling is inadequate unless accompanied by a breakaway swivel. The correct techniques vary based on the cable design and installation location. For instance, a proper technique involves pulling a cable into a conduit, while another correct approach is placing or laying a cable in a cable tray or raceway.
Apply fiber optic cable lubricant generously during the installation process within conduits. Lubricating the cable not only diminishes the pulling load but also minimizes the risk of breakage. It is essential to ensure that the chosen lubricant is compatible with the material of the cable jacket.
Always comply with local and national fire and building codes. Employ "firestopping" techniques for all cables penetrating firewalls and utilize plenum rated cables as required by regulations.
Inspect ducts and cable vaults before cable pull, avoiding fusion splicing in vaults.
Minimize cable tensions and reel vault locations to prevent service interruptions.
Secure vertical cable runs, use innerduct for potential future pulls, and keep a small slack cable for repair or relocation.
Ensure personnel are trained for installation safety.
No food, drink, or smoking where bare glass fibers are handled.
Use safety glasses with IR filters for extensive fiber work.
Segregate or isolate the work area to prevent access to unauthorized or untrained personnel.
Use dedicated ducts or trays for fiber optic cables and maintain watertight seals.
Test cables after shipping, clean connectors before use, and follow proper attachment procedures.
Conduct three separate tests during installation: on the reel, splicing test, and final acceptance test.
Cleaning